<img height="1" width="1" style="display:none" src="https://www.facebook.com/tr?id=192888919167017&amp;ev=PageView&amp;noscript=1">
Thursday,  April 25 , 2024

Linkedin Pinterest
News / Life / Food

Home-grown endive are heads above

Versatile winter green takes many steps to grow but not complicated

By Barbara Damrosch, Special to The Washington Post
Published: February 9, 2017, 6:00am

As a vegetable gardener, I keep a mental scorecard that compares what I grow with what I can buy in the store. Fresh tomatoes in January? The store wins, though its thick-skinned southern imports don’t get high points for flavor. In midsummer, when my homegrown bean pods are bulging with tender, quick-cooking shell beans, I give myself a blue ribbon, because few stores sell shell beans at all.

But sometimes the differences are more subtle. Take Belgian endive, for example. Also called witloof chicory, this plant is basically the wild, blue-flowered chicory that grows along roadsides, but in this case a strain bred for forcing.

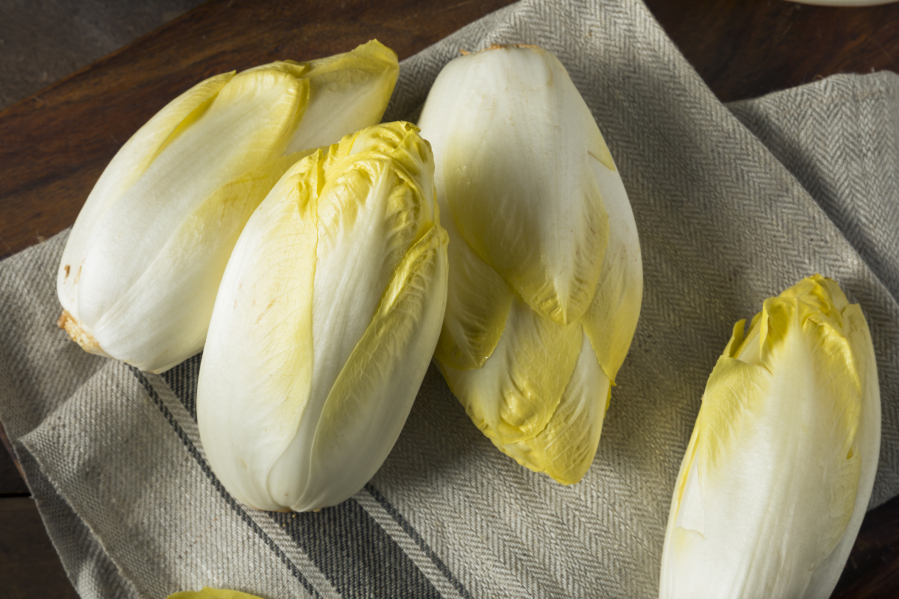
It’s sown in spring, grown in summer, then dug up in fall and induced to grow a second crop of blanched leaves during winter. The plant forms lovely, firm oval heads, pure white except for a bit of furled green at the upper edges. Unlike the bitter leaves produced outdoors in summer, these are mild and tender, with a satisfying crunch.

We’re forcing Belgian endive this winter, so I decided to compare our crops with the ones that the supermarket carries in winter.

A couple of years ago, I bought some to make an appetizer I’d thought up. When you break off individual leaves from the little heads, they’re shaped like elongated spoons. So I spread mayonnaise on the leaves, then filled them with finely grated carrots or beets, which made a colorful and delicious platter.

Those supermarket heads were hefty, smooth and perfectly shaped, but I was disappointed at how few leaves I got from them. Because the plants had a large, hard core, extending nearly halfway up from the base, their leaves were smaller and smaller as I went up. The core itself, though edible, was nothing special.

The heads we grew at home, though they were almost as large as purchased ones, had cores that were tiny in comparison, and the leaves were more uniform and plentiful. What had we done right?

Most likely, the practices of large-scale growers are designed to yield perfectly shaped heads, which are impressive to customers. And the large cores add weight, which increases profit when heads are sold by the pound. But ours were just right for my purposes as a cook.

Belgian endive has long been considered a luxury item, but it has grown in popularity. The leaves, chopped or whole, lend a delightful crunch to salads and are perfect for scooping up a savory dip. In most of Europe, and not just Belgium, it is a traditional crop, and even more popular as a cooked vegetable. Try braising it in a meat stock, caramelizing it in a pan with butter, or simmering it and topping it with a cheese sauce.

And do try growing your own. Yes, it’s a rather long process, but not a difficult one. The variety to grow is Totem, which takes 115 days to mature. Time your sowing to allow harvest just as light fall frosts are occurring. Sow the seeds in a garden bed and thin seedlings to four inches apart. When you dig up the plants around Halloween, discard the greens, leaving an inch of stem to preserve the growth tip. Sort through the roots, discarding forked or damaged ones. Trim the ones you keep to seven inches.

To store the roots, you need a very cool but frost-free spot without light. A cellar or unheated garage will work fine, or even a spare fridge. Keep the roots vertical, green side up, in case they start to regrow in storage. To begin the sprouting process, place some roots, again upright, in a two-gallon bucket and add six inches of water. Then put the bucket in total darkness, in a spot where the temperature will be about 60 degrees. (A low kitchen cabinet works fine.) Once the sprouting begins, it takes about three weeks to harvest. Any amount of light will green up the foliage that emerges and make the heads bitter instead of mild and sweet.

As insurance against light leakage, heavyweight black plastic bags placed over the containers and tucked in at the bottom will do the trick. If you want to force only a few roots at a time, you might use the cylindrical plastic containers made to store spaghetti.

This is a great project for kids, or just for the kid in you. At least, that’s the way I feel when I bring one of those buckets out of the dark, and there are the little white chicons, as the French call them, as welcome as spring flowers in a dark season.

Loading...