<img height="1" width="1" style="display:none" src="https://www.facebook.com/tr?id=192888919167017&amp;ev=PageView&amp;noscript=1">
Tuesday,  April 23 , 2024

Linkedin Pinterest
News / Life / Food

8 ways to make school-at-home lunches easier

By Genevieve Ko, , Los Angeles Times (TNS),
Published: October 7, 2020, 6:05am
2 Photos
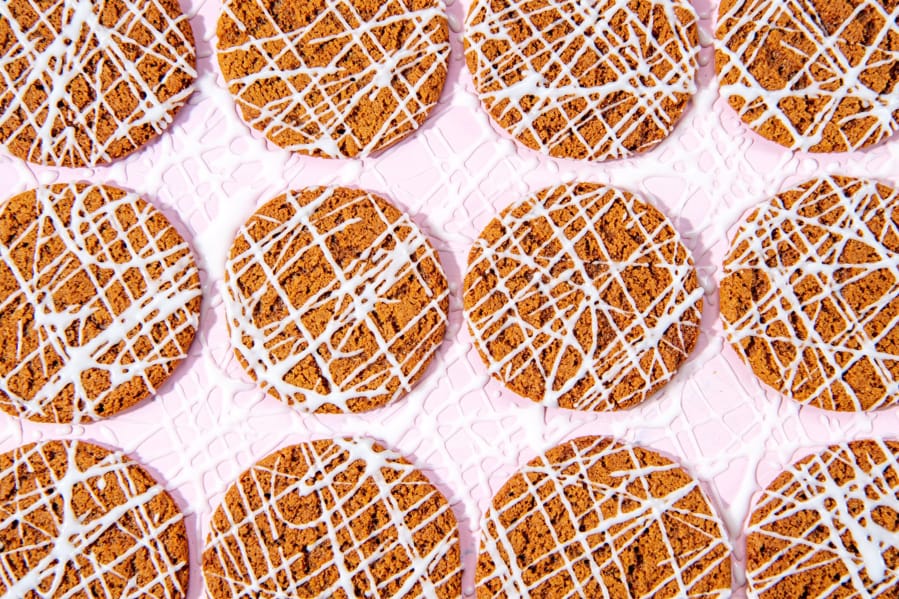
Brown Sugar Cookies with Maple Drizzle (Mariah Tauger/Los Angeles Times/TNS)
Brown Sugar Cookies with Maple Drizzle (Mariah Tauger/Los Angeles Times/TNS) Photo Gallery

I love cooking [–] that’s why I don’t like packing school lunches. It’s no fun making food that inevitably tastes subpar after hanging out in a brown bag for hours. Online schooling eliminates that issue but invites countless other mealtime problems, so I’m approaching “school lunch” the same way I always have: as a chore, not a joy. (And yes, I’m writing less as a professional cook and more as a working mother of three who is very, very tired.)

The tips below come from years of optimizing efficiency in restaurant and test kitchens and in my kitchen at home as well. They also address the cooking questions mom friends have asked me since quarantine started and the challenges they’ve shared. Feeding children is as much a mental and emotional struggle as it is a logistical one. Here are some ways to make it easier:

Go easy on yourself

You don’t need to stack artisanal sandwiches or fashion Hello Kitty faces on onigiri rice balls concocted from ham and seaweed. If you have the desire and energy for that next-level lunch-making, go for it. If not, don’t feel bad about it.

There have been days when I’m so exhausted from work (ironically, cooking) that I’ve simply popped open a can of beans, cut up a pepper and tossed string cheese packs on the table for a “meal.” My kids are still alive.

Don’t make three meals a day; batch cook for future meals

In April, one of my friends told me how wiped out she was from cooking breakfast, lunch and dinner [–] and doing all the dishes in between. My response: That’s crazy. Unless you actively want to be doing all that, don’t.

Instead, cook a lot when you feel like it and save leftovers for the times you lack kitchen motivation. Morning people can make huge breakfasts that last until lunch; folks with evening meetings can prep enough lunch to stretch to dinner. If you’d rather not eat the same thing for two meals in a row, refrigerate or freeze leftovers to reheat for future meals.

If you don’t want to do breakfast, buy cereal or make a big pot of oatmeal to last all week. If your kids insist on eggs every day, teach them to fry or scramble their own if they’re old enough to deal with the stove. Otherwise, boil half a dozen at once and keep them in a grab-bowl in the fridge. To streamline daily lunch prep, prepare big batches of building blocks, such as grains and beans, and keep them ready-to-scoop in refrigerated airtight containers.

Create a lunch routine

A lot of kids are perfectly content eating the same lunch most days or prefer the regularity of a scheduled menu. (And most home cooks find that deciding what to make is half the struggle of preparing a meal.) Make everyone happy by establishing a regular lunch repertoire: You can keep dishes in rotation to eat when cravings strike or assign certain lunches to certain days. My youngest always looked forward to “pasta Mondays” in her school cafeteria, so I’m going to re-create that for her, both to make her happy and to eliminate the stress of decision-making for me.

Leftovers are the best

If there’s a silver lining to school-at-home, it’s the ability to reheat leftovers for your kids midday. Popping a plate in the microwave takes less time than slapping together a grilled cheese sandwich, and it feels special to eat a steaming not-steam-table hot lunch.

Prepare dishes that hold up or even improve post-chill, such as roasted vegetables or anything stewed or braised. Rice, whether fried or seasoned with cilantro and lime, still tastes great after zapping. While pasta usually doesn’t reheat well, this one-pan number does. Toasting the noodles first keeps them al dente forever.

Assemble a ‘lunch box’ for the fridge

If you’re more of a cold-lunch family, make last-minute assembly easier by keeping all the ingredients together. Once you’ve figured out your repertoire, group what you need in an open container in the fridge. When it’s time for lunch, simply slide out the box full of sandwich or taco or salad fixings. It saves a little time and a lot of frustration digging around for that pack of sliced provolone. Do the same for any pantry items dedicated to lunch, keeping the box easily accessible wherever you have space.

If you’re adding leftovers or other unmarked ingredient containers to either box, use painter’s or masking tape to label them. So when someone who knows how to read keeps asking, “What do we have for lunch?,” you can simply gesture toward your lovely labels.

Experiment with seasoning vegetables

I’m often asked how to get kids to like vegetables and other nutritious foods, and I wish I had a magic solution that works for everyone. The one thing I can say is that a little seasoning goes a long way. Some kids like plain raw carrots, celery, cucumbers and tomatoes. All of those options [–] and really, anything else [–] taste better with a little sprinkle of salt. If you’re feeling ambitious, you can make a dip, salsa, dressing or crunchy topping to serve with raw and cooked vegetables.

Pickles add a bright tang to a meal, and homemade ones can be a fun family project. If you want an instant pickle-y option, simply toss sliced vegetables with a pinch each of salt and sugar and a splash of lemon juice or vinegar.

Let kids DIY

One of the first lessons in any professional kitchen is to taste what you’re cooking. You become invested in the dish’s outcome and learn about seasoning in the process. Over many years of teaching cooking classes and hosting playdates, I’ve seen how getting kids involved in prepping the meal makes them more likely to eat the food. Even toddlers can have a (messy) hand in it. Whether they sprinkle cheese on a tortilla, spread jelly over peanut butter or stir sauce into ramen, they’ll be more excited to eat their own creations.

I would be lying if I said this will make your life easier. It will not. It will make your kitchen messier and take more time, but it may make your little (and big) ones consume more if they’re fussy eaters.

Older kids can make their own lunches from start to finish, and yes, that process should include putting dishes away. You can set up the menu and fridge lunch-box, or let them determine what they want. My daughters are now teenagers and enjoy putting together their own midday meals. And because grocery shopping is one of the few things they can do during quarantine, they also like trips to choose their own ingredients.

Bake cookies

With everything we have to do as parents during online schooling, baking Cookies may not seem like a smart move. It’s neither “lunch” nor “vegetables.” But the act of it can be therapeutic alone time or sweet family bonding time, and the result of it is a way to brighten kids’ “school” days. Cookies can’t replace classmates or teachers or recess (or lunch, I guess), but they can bring joy.

ONE-PAN PASTA WITH TOMATO SAUCE

Time: 30 minutes

Yields: Serves 4 to 6

When angel hair cooks in tomato sauce, it soaks up its tangy taste [–] and cuts down on dishwashing. The broken noodles are first toasted in oil to give them a deep richness and to keep them from sticking together or becoming mushy. That means leftovers reheat beautifully. When eaten fresh out of the pan, the flavorful crust that develops on the bottom has a satisfying crackle.

1 pound angel hair pasta

3 tablespoons everyday extra-virgin olive oil

1 small yellow onion, finely diced

2 large garlic cloves, minced

Kosher salt and freshly ground black pepper

1 jar (24 ounces) marinara or other tomato sauce

2 1/2 cups chicken or vegetable stock or tomato juice

Finely grated Parmesan cheese, for serving (optional)

1. Grab a small bundle of angel hair, hold it over a large bowl, and break into 1-inch pieces. Repeat with the remaining noodles.

Morning Briefing Newsletter envelope icon
Get a rundown of the latest local and regional news every Mon-Fri morning.

2. Heat 2 tablespoons oil in a large, deep skillet over medium-high heat. Add the broken noodles and cook, stirring, until toasted dark golden brown, 3 to 4 minutes. Pour back into the bowl. Wipe out the skillet if any bits remain and return to medium-high heat.

3. Add the remaining tablespoon oil and the onion and garlic. Season with salt and pepper and cook, stirring often, until the onion is golden brown around the edges and almost translucent, 3 to 4 minutes. Add the marinara sauce and bring to a boil. Boil, stirring occasionally, until any watery liquid evaporates and the sauce thickens slightly, 3 to 4 minutes. Add the toasted noodles and stock and stir in carefully to mix. Continue stirring until the sauce returns to a boil, then spread in an even layer. The noodles should be submerged.

4. Reduce the heat to maintain a steady simmer and cook until the noodles are just tender, 8 to 10 minutes. You should hear a crackling sound and the noodles on top should start to curl up. Remove from the heat and season to taste with salt and pepper. Serve with Parmesan if you’d like.

Variations:

Shrimp Pasta: Before toasting the noodles, season 12 large peeled shrimp with salt and pepper. Sear in 1 tablespoon olive oil over high heat, about 1 minute per side. Transfer to a plate. Proceed with the recipe through step 3, then nestle the shrimp on top of the noodles at the beginning of step 4.

Vegetable Pasta: Stir 2 cups finely diced or thinly sliced vegetables, such as mushrooms, peppers, celery or carrots in with the onion and garlic.

Cheesy Pasta: After the noodles are done cooking, sprinkle the top with an even layer of shredded mozzarella. Run under the broiler until bubbling and lightly browned.

Make Ahead: Leftovers can be reheated for up to 5 days.

BROWN SUGAR COOKIES WITH MAPLE DRIZZLE

Time: 55 minutes

Yields: Makes about 45 cookies

Pure maple syrup, along with sea salt to complement its sweetness, gives both the cookie dough and the icing a homey warmth. So does brown sugar, which makes these cookies chewy in the center and crisp around the edges.

2 cups all-purpose flour

1 teaspoon baking soda

3/4 teaspoon fine sea salt, plus more

3/4 cup unsalted butter, softened

1 cup packed dark brown sugar

1/4 cup plus 1 tablespoon pure maple syrup

1 large egg, room temperature

1 teaspoon pure vanilla extract

1/2 cup packed powdered sugar

1. Heat the oven to 375 degrees. Line 3 cookie sheets with parchment paper.

2. Whisk the flour, baking soda and salt in a medium bowl.

3. Using a wooden spoon or rubber spatula, beat the butter and brown sugar until smooth and creamy. Add 1/4 cup syrup and beat until incorporated, then beat in the egg and vanilla until well blended. Add the flour mixture and fold gently until no traces of flour remain.

4. Using a 1 1/4-inch cookie scoop or measuring tablespoon, drop the dough onto the prepared sheets, spacing 2 inches apart.

5. Bake 1 sheet at a time until dark golden brown, about 12 minutes. Cool completely on the sheets on wire racks.

6. Stir the powdered sugar, remaining tablespoon syrup, 1 tablespoon water and a tiny pinch of salt in a small bowl. Taste and add more salt if you’d like. Drizzle all over the cooled cookies. Let stand until the drizzle hardens.

Variations:

Spiced Brown Sugar Cookies: Add 2 teaspoons warm spices, such as ground ginger, cinnamon, cardamom, nutmeg or a combination to the dry ingredients. You also can use apple pie spice or pumpkin pie spice.

Whole Wheat Brown Sugar Cookies: Substitute 1 cup whole wheat flour for 1 cup of the all-purpose.

Make Ahead: The cookies can be kept in an airtight container for up to 5 days.

Loading...