<img height="1" width="1" style="display:none" src="https://www.facebook.com/tr?id=192888919167017&amp;ev=PageView&amp;noscript=1">
Tuesday,  April 16 , 2024

Linkedin Pinterest

Getting pickled: 7 recipes that don’t use cucumbers

By Daniel Neman, St. Louis Post-Dispatch
Published: September 23, 2020, 6:05am
6 Photos
Pickled Eggs. (Hillary Levin/St.
Pickled Eggs. (Hillary Levin/St. Louis Post-Dispatch/TNS) Photo Gallery

Everyone sort of assumes it is the chicken. Everyone thinks that the process of pickling was invented as a way of preserving food in a time long before refrigeration, and that people who tried it decided that it tasted great, too.

But what if it were the egg? What if someone in that long-ago time dropped a cucumber in a vat of vinegar and salt because he thought it would taste good, and later discovered to his surprise that the liquid also helped to preserve the vegetables?

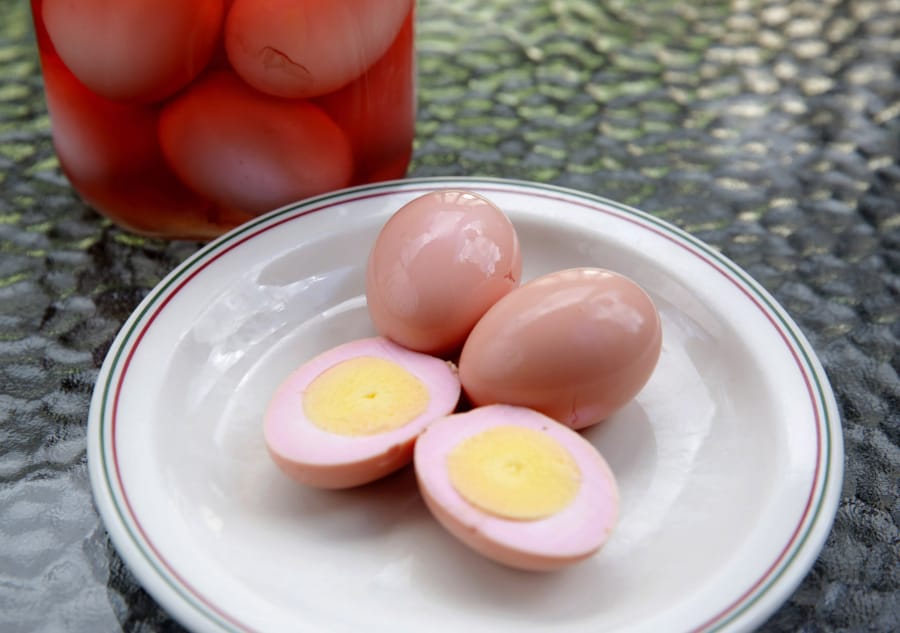
Not that it matters. Pickles are wonderful, and they last a long time. They’re the best of both worlds.

And they don’t have to be cucumbers. A wide variety of vegetables and even fruit can be pickled, with excellent results. Even meat can be pickled, if you have a mind to do it.

I don’t. I’ll do anything for food, but I won’t do that.

Instead, I made seven kinds of non-cucumber pickles, covering the spectrum of ingredients and styles _ sour and sweet, vegetables and fruit and eggs. I even made a Japanese version of sauerkraut which, when you get down to it, is just pickled cabbage.

I had one slight drawback in my efforts to be completely diverse in pickles: Three of the varieties I made were flavored with cinnamon and cloves. But what are you going to do? At least they taste good.

Let’s begin with green beans, which make straightforward, unfussy pickles. In that sense, you can think of them as a skinny version of pickled cucumbers.

First, you blanch the green beans; you want them partially cooked, but still crisp. After you have chilled them and put them in sterilized jars, you make a syrup of vinegar, salt and water all simmered together with an assortment of herbs and flavorings. Then you can them by putting the jars and their vacuum-seal lids into a boiling-water bath.

That’s a standard pickle, and a darned good one. Traditional spiced beets take that same formula and adds a small wrinkle, in the form of the aromatics that they use.

Ordinary pickled beets are made with nothing more than vinegar, salt and water (and maybe some red wine if you want to get fancy). But the spiced beets I made also benefit from cinnamon, cloves, allspice and the secret ingredient, star anise.

I love pickled beets. I always have. But these spiced beets may be my new go-to for canning.

Morning Briefing Newsletter envelope icon
Get a rundown of the latest local and regional news every Mon-Fri morning.

Next, I turned to sweet fruit pickles, and here is what I learned about them: I really, really like sweet fruit pickles.

Pickled cherries _ call them cerises au vinaigre, if you want _ make a delightful snack. Try them with a cheese plate. They are nicely sweet, with just a little hint of the vinegar that makes them pickles. In fact, the pickling liquid has almost twice as much sugar in it as vinegar.

The other ingredients? Our now familiar cinnamon stick and cloves.

Pickled pears are less like an hors d’oeuvre and more of a dessert. They are sweeter than the cherries, with just a whisper of vinegar for a contrapuntal edge. And the other flavors? Um, a cinnamon stick and cloves, but also allspice.

The other three pickles I made are different from the first group in that they are not canned _ that is, they are not vacuum-sealed in jars. That means they have to be refrigerated and will not last nearly forever.

Picked eggs are kind of a transition from canned pickles to uncanned pickles. Pubs around the world keep a big jar of pickled eggs on the bar and away from a refrigerator.

Don’t do that.

Pickled eggs use a simmered syrup, so the pickling liquid is concentrated. Even so, the eggs are subject to causing botulism if they are stored at room temperature. In the fridge, they will begin to lose their flavor after about three or four months.

But only if they last that long. Salt and vinegar are perfect complements to hard-boiled eggs, so pickling them produces egg perfection. I like to add a cooked beet to the pickling liquid, too, which not only turns the eggs a beautiful red but also tempers the sharp (but not unwelcome) flavor of vinegar.

Quick Red Onion Pickles are even farther from traditional pickles because the pickling liquid is not concentrated. This fact makes them ready to use almost immediately, though they will taste better after two days. Even in a refrigerator, they can only be kept for up to one month.

But only, again, if they last that long. These pickles take red onions and make them more mild while still keeping that nice crispy bite. Add them to your salad or put them on a hamburger or a sandwich. For an extra-good treat, put them on a fried or poached egg.

For a forkful of heaven, put them on top of a poached egg on top of a salad. You’re welcome.

The last pickle I made is as far as you can get from pickled green beans and beets and still be a pickle.

Hakusai no Tsukemono — the Japanese version of sauerkraut mentioned earlier — is nothing but Napa cabbage and salt. The salt draws water out of the cabbage, and that water serves as its pickling liquid.

Add dried peppers or a pepper spice mix if you want, or even pieces of carrots or — it being Japanese — dried kelp.

All it takes is a few days and a few pounds’ weight. The result is a delightful, salty snack.

That’s all you ever need from a pickle.

Pickled Green Beans

Yield: 6 pints

3 pounds green beans or yellow wax beans, stem ends removed

2 tablespoons salt, plus more for blanching

6 garlic cloves

6 small dried chile peppers

6 sprigs fresh herbs, such as basil, dill, tarragon, Thai basil or cilantro

3 1/2 cups white-wine vinegar

3 1/2 cups water

1 tablespoon granulated sugar

1 tablespoon yellow mustard seeds

30 black peppercorns

30 coriander seeds

1. Fill a large bowl with ice and water. Blanch the beans in well-salted boiling water (3 tablespoons of salt to 1 gallon of water) for 60 to 90 seconds, until they are bright and pliable but not cooked through. Drain and shock in the ice water. Trim to 4-inch lengths if necessary to fit into pint jars.

2. Divide the garlic, chilies and herbs equally among 6 prepared pint jars. Pack the beans into the jars.

3. Combine the vinegar, water, the 2 tablespoons of salt, sugar, mustard seeds, peppercorns and coriander in a saucepan, and bring to a boil. Ladle the hot syrup over the beans, leaving 1/2-inch headspace. Seal, and process in a boiling-water bath for 10 minutes.

Per serving (based on 12): 82 calories; 1 g fat; 1 g saturated fat; no cholesterol; 3 g protein; 15 g carbohydrate; 6 g sugar; 5 g fiber; 1,182 mg sodium; 89 mg calcium

Recipe from “Saving the Season” by Kevin West

Hakusai No Tseukemono

Yield: 6 cups

4 to 5 pounds napa cabbage (Chinese cabbage)

3 to 4 ounces salt

1/2 teaspoon to 1 teaspoon togarashi (a Japanese spice blend) or 6 dry red peppers

1. Wash cabbage and discard any discolored leaves. Cut an X in the root end about 3 inches deep and pull the cabbage apart into 4 quarters. Sprinkle each quarter with salt.

2. Place a layer of leaves in a tub, crock or large bowl, sprinkle with more salt and some of the togarashi or a dried pepper. Continue adding layers until all of the cabbage, peppers and salt is used up. Place a plate or disc of wood on top, along with a few pounds’ of weight. Cover with cloth and store at room temperature.

3. After 24 hours, the stack of cabbage will have halved in size. Remove the weight and disc, turn the cabbage with your hands and replace the disc and weight. Do not drain the liquid.

4. Let sit for 3 to 4 days. Cut out the hard white core of the cabbage and slice the rest crosswise in 1-inch pieces. Taste, and if it is too salty or hot, rinse as needed with water.

5. The cabbage will continue fermenting, so when it is as sour as you want it, remove from the tub or bowl, drain the excess liquid, and store covered in the refrigerator.

Per serving (based on 12): 33 calories; no fat; no saturated fat; no cholesterol; 2 g protein; 7 g carbohydrate; 3 g sugar; 2 g fiber; 468 mg sodium; 120 mg calcium

Recipe from “Japanese Country Cookbook” by Russ Rudzinski

Traditional Spiced Beets

Yield: 4 pints

6 pounds small beets (6 to 8 bunches)

2 cups wine vinegar, white or red

2 cups water

1 cup granulated sugar

1 tablespoons salt

3 inches cinnamon stick

5 whole cloves

5 allspice berries

1/2 pod star anise

1. Fill a large bowl with ice and water, and set aside. Trim the beet greens to 1 inch above the root, but leave the root’s skinny “tail” intact to prevent bleeding. Boil the beets whole in unsalted water until a skewer pierces them easily, 30 to 40 minutes, depending on size.

2. Meanwhile, prepare the vinegar syrup. Combine the vinegar, water, sugar, salt, cinnamon stick, cloves, allspice and star anise in a saucepan, and bring to a boil. Turn off the heat and set aside to steep.

3. When the beets are tender, drain and plunge them into ice water. Slip them out of their skins, tidying up the root and stem ends with a knife as necessary. Cut the beets into quarters and pack them snugly into 4 prepared (clean and sterile) pint jars.

4. Ladle the hot syrup into the jars, straining it through a small, fine-mesh sieve to capture the aromatics. Gently shake the jar as you fill it to settle the beets. Leave 1/2 inch headspace. Run a skewer or other thin implement around the inside to release air pockets. Seal the jars, and process in a boiling-water bath for 30 minutes. Allow to cure at least a week before opening.

Per serving (based on 16): 132 calories; 1 g fat; 1 g saturated fat; no cholesterol; 3 g protein; 30 g carbohydrate; 24 g sugar; 6 g fiber; 575 mg sodium; 43 mg calcium

Recipe from “Saving the Season” by Kevin West

Quick Red Onion Pickle

Yield: 1 1/2 cups

1 medium red onion (about 8 ounces), peeled

3 cups boiling water

1 cup white wine vinegar or apple cider vinegar

1 tablespoon granulated sugar

1 teaspoon fine sea salt

2 teaspoons spices, such as black or pink peppercorns, coriander seeds, cumin seeds or juniper berries, optional

1. Have ready a spotlessly clean 1 1/2-cup glass jar with a tight-fitting lid.

2. Using a sharp knife or mandoline, cut the onion into slices 1/8-inch thick, working your way from stem end to root. Put the onions slices in a colander in the sink, separating the slices into rings.

3. Pour the boiling water over the onion rings. Pack them into the jar.

4. In a small saucepan, combine the vinegar, sugar, salt and spices, if using, and bring to a simmer, stirring to dissolve the sugar and salt. Pour into the jar, tamp down the onion rings so they are fully immersed, and close the lid. Cool on the counter completely before using, 1 to 2 hours (but the flavor will improve over the next 2 days). Store leftovers in the refrigerator up to 1 month.

Per serving (based on 4): 37 calories; no fat; no saturated fat; no cholesterol; no protein; 7 g carbohydrate; 4 g sugar; 1 g fiber; 594 mg sodium; 21 mg calcium

Recipe from “Tasting Paris” by Clotilde Dussoulier

Pickled Pears

Yield: 4 pints

4 cups granulated sugar

2 cups plus 1 tablespoon white vinegar, divided

9 cups water, divided

4 cinnamon sticks, broken in half

1 tablespoon whole cloves

1 tablespoons whole allspice berries

4 pounds firm pears

1 tablespoon salt

1. In a large pot, combine the sugar, 2 cups of the vinegar, 1 cup of the water and cinnamon sticks. Place cloves and allspice in cheesecloth and tie it together or place the spices in a tea strainer or teabag. Add the spices to the mixture, bring to a boil and simmer, covered, about 30 minutes.

2. Pour the remaining 8 cups of cold water into a large bowl and stir in the remaining 1 tablespoon vinegar and salt. Wash and peel the pears; remove the blossom end and cut into quarters or halves. Immediately place the pear pieces into the prepared cold water to prevent browning. Drain just before using.

3. Add pears to the boiling syrup and continue simmering for 20 to 30 minutes. Pack hot pears into clean, hot pint jars; add 1 piece of cinnamon stick per jar and cover with boiling syrup to 1/2 inch of top. Adjust jar lids.

4. Process in boiling water for 20 minutes (begin counting when the water resumes boiling). Remove jars and tighten seals, if necessary. Store jars upright, several inches apart, on wire rack to cool.

Per serving (based on 16 servings): 118 calories; no fat; no saturated fat; no cholesterol; 1 g protein; 31 g carbohydrate; 24 g sugar; 4 g fiber; 153 mg sodium; 26 mg calcium

Recipe from “Complete Guide to Home Canning, Preserving and Freezing” by the United States Department of Agriculture

Pickled Eggs

Yield: 12 servings

1 cup white vinegar

1 cup water

1 tablespoon granulated sugar

1 teaspoon salt

1 teaspoon peppercorns, see note

10 whole cloves, see note

1 bay leaf, see note

2 dried whole chile peppers

1 cooked beet, optional

12 hard boiled eggs, peeled

Note: Instead of using peppercorns, cloves, bay leaf and dried peppers, you can use 2 teaspoons of pickling spices.

1. Combine vinegar, water, sugar, salt, peppercorns, cloves, bay leaf and dried peppers (or pickling spices) in small saucepan. Add cooked beet for a beautiful magenta color, if desired. Bring to boil, stirring frequently, until sugar dissolves. Reduce heat to low, cover and simmer for 10 minutes. Strain liquid through sieve or cheesecloth, if desired.

2. Place eggs in a 1-quart jar with lid. Pour hot liquid over eggs. Cover jar with lid. Refrigerate for at least two days before using. Pickled eggs will keep for one month in the refrigerator.

Per serving: 88 calories; 5 g fat; 2 g saturated fat; 186 mg cholesterol; 7 g protein; 4 g carbohydrate; 2 g sugar; 1 g fiber; 274 mg sodium; 39 mg calcium

Recipe from eggs.

Loading...