<img height="1" width="1" style="display:none" src="https://www.facebook.com/tr?id=192888919167017&amp;ev=PageView&amp;noscript=1">
Thursday,  April 25 , 2024

Linkedin Pinterest
News / Life / Food

Learn to use – and love – your cast-iron skillet

By Arthi Subramaniam, Pittsburgh Post-Gazette
Published: May 19, 2021, 6:03am
5 Photos
Chocalate-chip sour cream coffee cake.
Chocalate-chip sour cream coffee cake. (Pittsburgh Post-Gazette/TNS) (Pittsburgh Post-Gazette/TNS) Photo Gallery

Anne Byrn’s black Griswold has been a workhorse in her kitchen. She has fried bacon, cooked pancakes, seared salmon and baked Southern-style cornbread in the 12-inch cast-iron skillet umpteen times.

It was not until her 14th cookbook that the New York Times-bestselling author turned to skillets. She particularly wanted to feature recipes that are not often associated with cast-iron cookware. But with it came an anxiety for “The Cake Mix Doctor.”

“I thought people were going to expect me to have a cake recipe and I had no idea if it was going to work,” the Nashville resident said in a phone interview.

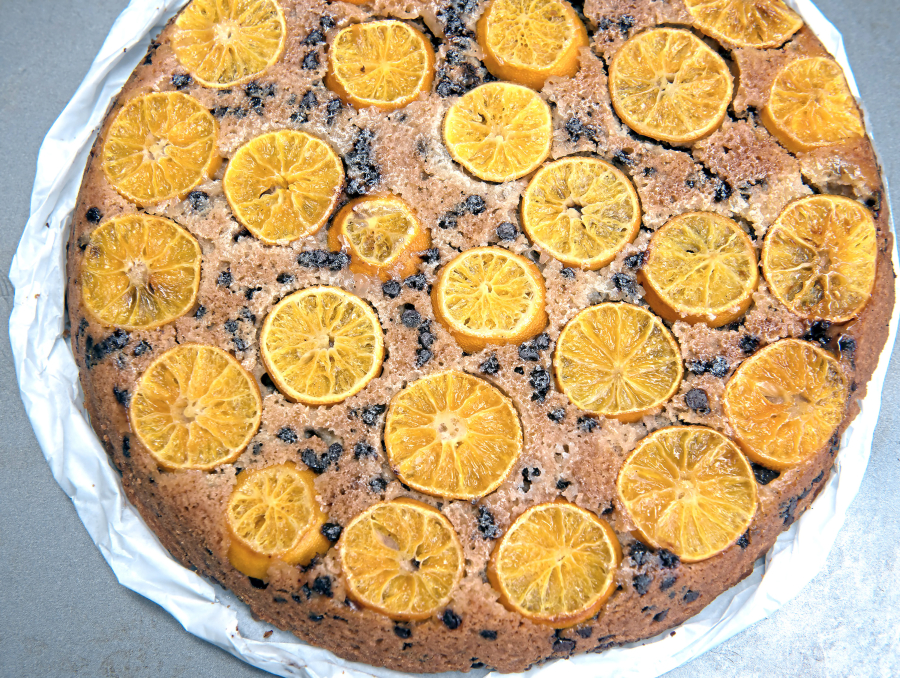
The only way to test it, she said, was with a pound cake as it has minimal ingredients. So she baked one with butter and heavy cream, and it was a success. The cake baked to a glorious height with a crispy, cookielike top and popped out of the skillet beautifully. When she sliced into the cake, she found it had the most even texture.

“I remember thinking that there was something about the skillet that insulates the cake and made sure that the oven didn’t overcook it. It acted as a buffer,” Byrn said.

Her on-and-off again relationship with her skillet became a full-blown love affair. She started making more cakes like ones with blueberries and prunes. For a brown sugar birthday cake, she even prepared a caramel icing in the skillet.

Fascinated by its construction, she wanted to know more. The beautiful project became her latest book, “Skillet Love: From Steak to Cake” (Grand Central Publishing, October 2019).

She said one of the best parts of cooking with a skillet is that it locks in and seals big and bold flavors when roasting vegetables and searing fish and steak. She advocates it for rookies, skilled cooks and anyone who wants to perfect baking bread, make a better steak or cook fish over an open fire.

“I also like it for its healthfulness,” she said. “We often think how great it is for frying food but it is perfect for roasting and it does not need too much oil. Plus, it releases small amounts of iron into the food, especially when something acidic like tomatoes and lemons are cooked. And that’s a good thing for women in particular.”

Here are some of Byrn’s other discoveries about what and how to cook in a cast-iron skillet and why the food tastes so good:

Size matters

The top part of the skillet flares out. So if you can have only one skillet, make sure it is a 12-inch because essentially it has a 10-inch cooking surface. If you cook with a 10-inch skillet, the cooking surface is only 8 inches and that is rather small for roasting vegetables. If there is not enough of a surface area, the vegetables will be steamed and not roasted.

Eggs? Fuhgeddaboudit

You would think it is easy to make eggs in a skillet, but it’s not. To cook or fry eggs successfully, the pan needs to be very well-seasoned (coated with baked oil). That means you shouldn’t try it in a brand-new skillet or one that is in the process of being seasoned.

Cast-iron skillets are not designed for scrambling eggs because they will stick unless a ghastly amount of fat is used. Eggs need to be scrambled on low heat so they are tender, soft and have those big curds. This is not what the skillet is about — it wants heat blasted.

Hear, hear, sear

A cast-iron skillet is a steak’s BFF. It can withstand high heat and helps to distribute that heat evenly. As a result, it yields a perfect brown crust that seals in the meat’s juices. Even a cheap skillet can do this job well. Be sure to use a dry seasoning; save wet marinades for other types of cooking. Start out by adding very little oil to a very hot skillet. Season the meat with salt and pepper and let it sit for several minutes undisturbed. You will end up with a beauty.

Like a wok, sort of

A wok is the go-to pan for stir-frying. But if you don’t have one, a cast-iron skillet could do the trick. Stir-fries come out best when the heat is cranked up, and a skillet can do that. Unlike a wok, it is harder to lift to toss the ingredients. The main thing is to keep the food moving, so a deep skillet is best to keep the ingredients from falling out. Cook vegetables, aromatics and meats in separate stages and set them aside. Finally, add them all back together with the sauce.

Inoffensive roasting

Heat a skillet first before adding oil, especially when roasting Brussels sprouts. They will get a better sear and turn out sweeter. The oil acts as a barrier at first and prevents vegetables from sticking to the skillet. Later, it helps to sear them.

To make crispy potatoes, coat them well with olive oil and be sure not to overcrowd the skillet. Potatoes need a lot of surface area to get the proper color and flavor.

Eggplants, squashes and peppers are not fussy nor do they take time to roast. However, they too need good surface area.

Sun-drenched summer tomatoes, tossed with olive oil, do not need to be placed in an even layer. The high heat will help the tomatoes burst and add a jammy taste.

Fried and true

Fried chicken and cast-iron skillets are inseparable, because frying is all about oil and heat. Keep the skillet well-seasoned to maintain a natural nonstick surface. But frying chicken in a shallow skillet can also create a mess. So pan-fry the bird by first cooking the meat skin-side down in the oil, undisturbed, for a few minutes until the skin is deeply brown. Then cook the other side until it’s browned, too. After browning all pieces, pour off the oil, place the skillet in the oven and bake until the chicken has cooked through.

Potato-Raisin Bread Spiral

Makes 12 to 16 servings. “Skillet Love: From Steak to Cake” by Anne Byrn (Grand Central Publishing; October 2019)

1 medium baking potato, peeled and cubed

11/2 cups water

1 package (0.25 ounce) active dry yeast (2 1/4 teaspoons)

1/3 cup sugar, divided

41/2 to 5 cups all-purpose flour, divided

2 large eggs, lightly beaten

1/2 cup (1 stick) unsalted butter, melted

1 cup raisins

1 teaspoon salt

Vegetable oil, for greasing

Place the cubed potato in a small saucepan and cover with water. Bring the water to a boil over medium-high heat. Then reduce the heat to low, cover and let simmer until the potatoes are tender, 15 to 20 minutes.

Drain potatoes, reserving the cooking water. Mash potatoes in a small bowl and set aside.

Transfer 1 cup of the potato water to a large bowl. Whisk in yeast and 1 tablespoon of sugar until dissolved.

Add 2 tablespoons of the mashed potatoes to the yeast mixture.

Add 1 cup of flour. Beat with a wooden spoon or an electric mixer on medium speed until the ingredients are combined.

Let the mixture rest until it bubbles up slightly, about 20 minutes.

Add the remaining sugar, 3 cups flour, eggs, melted butter, raisins and salt.

Beat with the electric mixer on medium speed until the dough is soft and combined. Add 1/2 to 1 cup more flour as needed so that the dough comes together and away from the sides of the bowl. With the mixer fitted with a dough hook, beat the dough until it comes into a ball, 3 to 4 minutes. (You can also knead by hand until it comes into a ball, about 5 minutes.)

Lightly grease a large mixing bowl with vegetable oil and place the dough in the bowl. Cover the bowl with a kitchen towel and place in a warm spot until the dough doubles in size, about 1 hour.

With oiled or floured hands, punch down the dough. Turn it out onto a floured surface and roll with your hands into a rope that is 20 to 22 inches long.

Lightly grease the bottom and sides of a 12-inch skillet with vegetable oil. Pick up the dough rope and lay it in the skillet, starting at the edge and letting it coil like a snake, ending in the center. Cover the skillet with a kitchen towel and let rise in a warm spot until doubled, about 40 minutes.

When ready to bake, preheat the oven to 350 degrees. Bake until the top of the bread is golden brown, 20 to 22 minutes.

Tent the skillet with foil and continue to bake until the bread sounds hollow when tapped, 20 to 25 minutes.

Remove the skillet from the oven and cool for 10 minutes. Run a knife around the edge of the skillet. Lift up the potato bread and place it on a wire rack to cool completely before slicing, about 30 minutes.

Best Ever Skillet Pizza

Makes 4 to 6 servings as an appetizer and 2 to 3 servings as a meal. “Skillet Love: From Steak to Cake” by Anne Byrn (Grand Central Publishing; October 2019)

It is important to heat the skillet at 450 degrees before placing the dough in the pan. You can use store-bought dough here. If you freeze the dough, make sure to let it rest on the counter for an hour to thaw. This dough takes slightly less time to cook (15 minutes) than the homemade crust (15-20 minutes), author Anne Byrn says.

1 pound store-bought pizza dough

1 to 2 teaspoons cornmeal

1 to 2 tablespoons olive oil

2 cloves garlic, peeled and minced

1/2 to 3/4 cup tomato sauce

2 cups shredded mozzarella cheese

Honey, for brushing

Red pepper flakes, optional

Preheat oven to 450 degrees.

Heat a 12-inch skillet on the stove top over medium-heat until quite hot, 3 to 4 minutes.

While the skillet is heating, stretch out dough to get it as thin as possible, about 12 inches in diameter. You can do this in the air or by pressing it out with your hands on a cornmeal-dusted work surface.

Sprinkle cornmeal in the hot skillet.

Taking care not to burn your fingers, place the dough in the pan on top of the cornmeal. Press dough halfway up the sides of the pan (it will shrink back and that’s OK).

Whisk together olive oil and garlic and brush the mixture over the dough. Spoon on the tomato sauce. (Add desired toppings at this point.)

Scatter cheese all over. Brush honey on the crust edges and sprinkle red pepper flakes on top of the honey, if desired.

Turn off the stove and place the skillet in the oven.

Bake until the cheese has melted and just starts to brown, and the crust edges are browned, 15 to 20 minutes. Carefully run a knife around the edges and slide the pizza out onto a board to slice and serve.

Stay informed on what is happening in Clark County, WA and beyond for only
$9.99/mo

Topping variations

Garden Vegetable: After spooning on the tomato sauce, add 1/2 cup of store-bought pesto, spreading it evenly. Sprinkle 1 cup of mozzarella cheese on top. Slice 2 beefsteak tomatoes, mini yellow, red and orange peppers (2 each) and 4 to 5 pickled jalapeno slices and place them over the cheese.

Scatter the remaining cup of mozzarella cheese and bake following the recipe’s directions.

Eggplant Parm: After spooning on the tomato sauce, add mozzarella cheese. Slice 2 medium Japanese eggplants into thin rounds and put them in a bowl of cold water until they are ready to be cooked. In a skillet, add 2 tablespoons of olive oil over medium heat. Add eggplant slices in batches and pan-fry until they are slightly brown on both sides. Add more oil if needed. Sprinkle eggplant slices with salt to taste. Place slices on top of the crust.

Scatter 1 cup of cherry tomatoes, halved. Sprinkle 2 tablespoons of grated Parmesan cheese over the vegetables. Bake following the recipe’s directions. After taking the skillet out of the oven, sprinkle 2 tablespoons of chopped basil while the pizza is hot.

Chocolate Chip Sour Cream Coffeecake

Makes 12 servings. “Skillet Love: From Steak to Cake” by Anne Byrn (Grand Central Publishing; October 2019)

1/2 cup (1 stick) plus 1 tablespoon unsalted butter, melted, divided

11/2 cups plus 2 tablespoons sugar, divided

12-16 thin orange slices

2 cups all-purpose flour

2 teaspoons baking powder

1 teaspoon baking soda

1/4 teaspoon ground cinnamon

1/4 teaspoon salt

1/2 cup vegetable oil

1 cup sour cream

1 tablespoon vanilla extract

2 cups (12 ounces) miniature semisweet chocolate chips

Preheat the oven to 350 degrees.

Melt 1 tablespoon of butter in a 12-inch skillet over medium heat, swirling the skillet to distribute the butter evenly, about 2 minutes.

Sprinkle 2 tablespoons of sugar evenly over the melted butter. Place the orange slices on top of the sugar, creating a decorative pattern, either overlapping them in circles or creating concentric circles of slices.

Heat the skillet for another 2 to 3 minutes to allow the sugar to dissolve. Remove the skillet from the heat.

In a large bowl, whisk together flour, 11/2 cups sugar, baking powder, soda, cinnamon and salt.

Add the remaining 1/2 cup melted butter, oil, sour cream and vanilla. Mix with an electric mixer on medium speed (or by hand) until just combined, 1 minute. Fold in chocolate chips.

Dump the batter into the skillet on top of the oranges. Bake until the top of the coffeecake has lightly browned and is firm to the touch, 40 to 45 minutes.

Run a knife around the edges of the skillet to loosen the coffeecake. Invert the skillet onto a wooden board lined with parchment paper. If any of the oranges stick to the bottom of the skillet, slide under them with a small metal spatula and place them on top of the cake.

Loading...