SEATTLE — For most of us in the wet Pacific Northwest, it can be hard to tell regular moss time from peak moss time.
Because it’s so ubiquitous, it may only rise to consciousness among gardeners and hikers who enjoy its luscious beauty — and homeowners who likely enjoy it far less when it’s on their roofs.
Nevertheless, it’s peak moss season in the region. And in honor of the season, we present a few tips and tricks for preserving or cultivating it in some places and eradicating it in others.
There are over 700 species of mosses in the northwest, according to the Portland Nursery. Moss grows from spores instead of seeds, on roofs, walls, sidewalks, trees, window sills, lawns and cars left too long in the yard.
“A rolling stone may even collect moss here,” said the nursery, which sells three kinds of the resilient, flowerless plant that rehydrates quickly after drying and thrives in moist, shady areas.
As hard as it might be to believe for the people who will buy moss for their yards, there are others who see the plant as a problem.
“The moss divide,” as William Yardley described it in a 2011 article in The New York Times.
“So many of the calls we get are from people who actually want to get rid of moss,” moss lover Sue Hartman of Seattle Tilth said in the article.
In moist environments such as the northwest, many mosses harbor cyanobacteria that convert atmospheric nitrogen into a form that can be used by other plants, according to the Pacific Northwest Pest Management Handbook by Oregon State University.
Mosses also reduce soil erosion, provide hydrobuffering by soaking up a lot of water and are great bioindicators of air pollution.
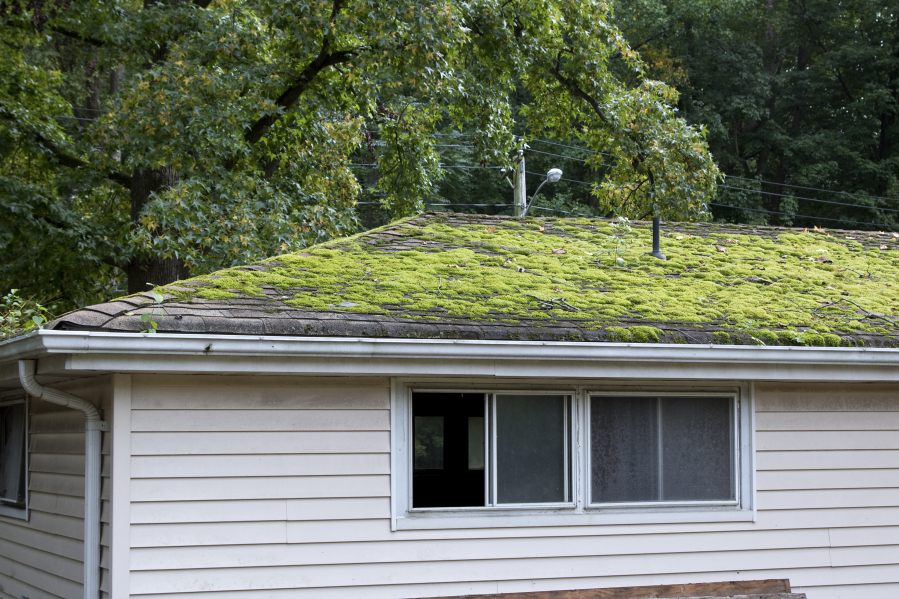
Even moss lovers, however, may have to concede that it can be problematic on roofs, causing virtually any roofing material — especially wood and asphalt, but also clay, concrete and even metal — to degrade, drastically shortening its lifespan.
Here are some tips from Seattle-based PEMCO Insurance on how to safely remove moss from roofs.
- Trim nearby tree branches to prevent them from shading the roof and dropping leaves and needles.
- Try dislodging the moss with a stiff broom. This works best if moss isn’t extensive and there has been a recent stretch of dry weather.
- If you choose to pressure-wash, make sure you or your contractor use the gentlest setting that will work. Pressure suitable for cleaning concrete, for example, can shred wood fibers, shortening the life of your roof.
- If your roof is cedar, apply a water repellant formulated especially for cedar roofs after pressure washing.
- Consider an anti-moss treatment (including organic options) specially formulated for roofs. Follow manufacturer’s instructions carefully and consider environmental concerns about surrounding vegetation and water.
- Avoid home remedies like sprinkling laundry detergent on your roof. Degreasing agents in the soap can attack and degrade some roofing materials, breaking down their water-shedding properties and causing leaks, sometimes within days of application.
- Avoid walking on fragile roofs. Steer clear of cupped or curled shakes or shingles, which are prone to cracking, especially in cold weather. Clay tile and slate roofs call for extra caution, too.
- And most importantly: Before you climb the ladder, remember that your roof is a dangerous place, particularly if it has a steep pitch. If you’re unsure about your ability to safely de-moss your roof, call a reputable roof maintenance company to handle the job.
For those who want more moss, the Portland Nursery offers a recipe for a do-it-yourself moss milkshake that can then be cultivated where desired.
DIY moss milkshake
- Find a heaping handful of moss, preferably growing in similar circumstances to where you want to spread it. Using multiple species of moss to increase the chances of success.
- Break up moss into a blender. Add 2 cups of buttermilk, yogurt, beer or potato water and enough water to make a thick consistency. Blend thoroughly until the mixture is like a thick milkshake or smoothie.
- Use a paintbrush to apply to your desired surface (rocks, walls, soil). It is best if it does not rain soon after because it can wash the milkshake away.
- Gently mist the area daily (when dry) until moss begins to grow. This may take six to 18 months.
Seattle gardener Ciscoe Morris, however, believes that method can cause strife.
“Relying on recipes that call for mixing moss in the kitchen blender rarely succeed and can lead to expensive relationship counseling,” he wrote in a column for The Seattle Times.
Here is his method:
- On a relatively warm and dry day, find a clump of moss growing on a surface similar to where you want the moss to grow. For example, if you want to transplant moss to an outcropping stone, find some growing on another rock, a concrete wall or on a sidewalk. Likewise, if you want to grow it on a tree, find moss growing on the branches or trunk of a tree or shrub.
- Gently remove it.
- Use “Shoe Goo” to glue the clump of moss onto its new home. Follow the directions on the label and try to find a spot where the moss will stick easily, such as on a flat shelf of a rock or in the branch union of a tree.
- As soon as the glue has set, spritz the moss with a mixture of one-third buttermilk and two-thirds water.
- Repeat the process at least once or twice daily for two weeks. By then, the moss usually becomes sufficiently established to survive on its own.