<img height="1" width="1" style="display:none" src="https://www.facebook.com/tr?id=192888919167017&amp;ev=PageView&amp;noscript=1">
Thursday,  April 25 , 2024

Linkedin Pinterest
News / Life / Lifestyles

DIY expert breaks down steps of thrift-store refurb

By Samantha Melamed, The Philadelphia Inquirer
Published: January 19, 2017, 6:05am
3 Photos
Theresa Clements with the cabinet she refreshed at the ReStore.
Theresa Clements with the cabinet she refreshed at the ReStore. (Photos by Yong Kim/Philadelphia Daily News) Photo Gallery

PHILADELPHIA — In the showroom of the Habitat for Humanity ReStore, the furniture thrift store, there is lots and lots of brown — vintage wooden dressers, tables and chairs in hues from beige to ochre to umber.

But when Theresa Clements — Ambler TV personality, designer, DIY expert, and blogger at MyFixItUpLife.com — walks through, she sees past the drab.

To her, potential showstoppers are waiting to be revealed, with a few simple — or radical — tweaks and some bold color choices.

That unassuming, boxy little nightstand could be flipped on its side, with its drawer removed, and topped with pallet wood to make a modern coffee table. Take two office chairs, face them toward each other, saw off the arms, and add a new seat: You have a stylish bench with high, curved arms.

Clements always loved making things as a kid, then she studied architecture and design and began working as a contractor with her husband and collaborator, Mark. But she noticed a scarcity of women on job sites (people often took her for a bookkeeper), and she found many of her friends were afraid to pick up a circular saw.

“A lot of people do a lot of Pinterest, but not a lot of projects.”

She’s on a mission to change that. She got involved with Habitat for Humanity ReStore three years ago, running DIY workshops.

“It’s amazing: I get to help inspire people to make stuff, and then it helps people have a place to live,” she said.

Clements walked us through a do-it-in-one-day thrift-store-find transformation.

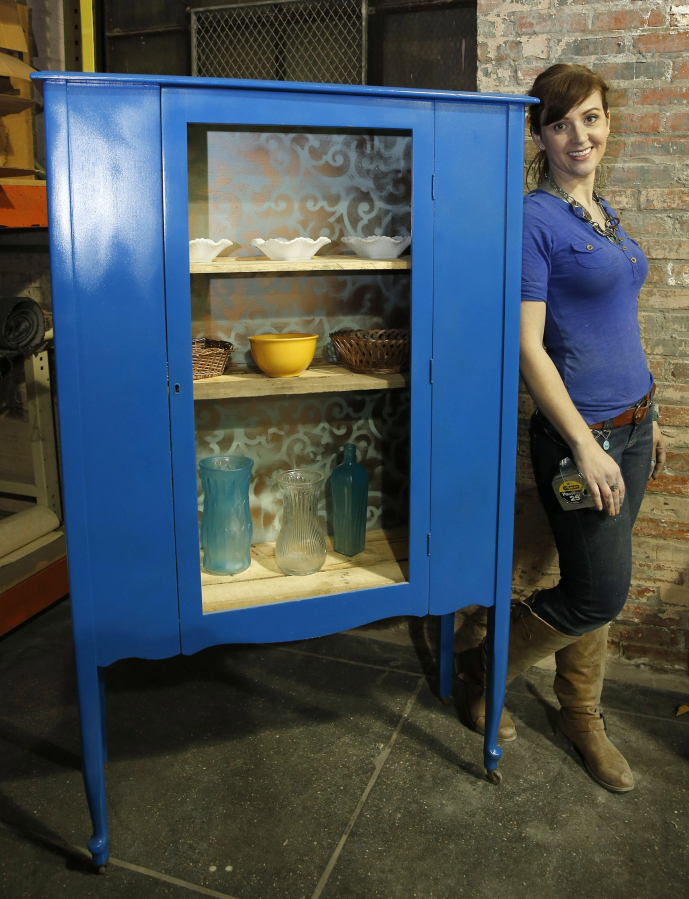
• Find a piece with good bones: something sturdy that’s made of solid wood that won’t fall apart as you tinker. Clements selected a mission-style china cabinet (ReStore’s price: $35) that was missing the glass on its permanently locked door and all its shelves. But it had sweet simple lines. “A lot of people would walk by that and shrug, but it’s well-built,” she said. Her vision: With a few adjustments and a lot of paint, it could be a stylish bookshelf.

• Gather supplies. For this project, Clements used a drill/screwdriver, a saw (her portable saw, the BladeRunner, costs about $100; a miter saw would also work), painter’s tape, fine-grit sandpaper, pallet wood, stain, a drop cloth, cleaning cloths, cardboard, a tape measure, a level, and screws. Spray primer and spray paint are key to finishing a project like this in six to eight hours. Disposable wood-finishing wipes, newly available at hardware stores, allow you to apply stain quickly and neatly.

• Clements lightly sanded the cabinet with the grain, making it just rough enough to catch the paint. Then she wiped off the dust with a cloth. She sprayed the entire cabinet with primer. (The key is using quick strokes to lightly dust the surface with paint.) She waited a few minutes and applied a second coat. If she got too close and paint started to pool or drip, she blotted the excess away with a clean cloth.

• She lined the back edges of the cabinet with painter’s tape to protect them from paint. Then she used scrap cardboard to shield the interior of the cabinet and gave the exterior a coat of cobalt blue. Again, she sprayed in quick, light coats. The paint label will say how long you have to wait before a second coat. “If you didn’t use the whole bottle, turn it upside down and spray until it’s clean, and that clears the nozzle. Then, when you go back to it a year later, you can use it again.”

Stay informed on what is happening in Clark County, WA and beyond for only
$9.99/mo

• She made shelves out of planks liberated with a saw from old wooden pallets. First, she measured the interior of the cabinet so she could make the planks just a bit shorter and narrower. “Measure in a couple of places, because with old pieces of furniture, things can move. It’s always better to go big than small, since you can’t make the material grow.” She cut small scraps of wood into cleats to hold three planks together and used screws to attach them into a single shelf. Then she stained the shelves.

• She painted the interior pale green. A piece of decorative scrolled wood from the missing glass cabinet front was lying in the cabinet, Clements used it as a quick stencil, creating a wallpaper effect in the back of the cabinet with contrasting spray paint in metallic rose gold.

• Finally, she cut small blocks of wood to serve as brackets supporting the shelves. She put two screws in each, then attached them to the sides of the interior of the cabinet, using a tape measure to place the shelves equidistant, then a level to make sure they were straight.

• She styled the shelves with ReStore finds, transformed with quick coats of spray paint. She used metallic rose-gold paint on baskets, and seaglass spray paint to upgrade glass pieces. “It turns something cheap — this is a 50-cent vase here — into something really cool.”

Loading...