<img height="1" width="1" style="display:none" src="https://www.facebook.com/tr?id=192888919167017&amp;ev=PageView&amp;noscript=1">
Friday,  April 26 , 2024

Linkedin Pinterest
News / Life / Food

Avoid those easy-to-make baking mistakes

Give yourself a fighting chance by following these suggestions

By James P. DeWan, Chicago Tribune
Published: January 2, 2018, 6:00am

What in the wide tarnation is better on a winter’s day than the smell of something sweet baking in your oven? OK, world peace, I suppose.

Oh, and justice. Justice for everyone. Justice and world peace are better than nice smells, then, but, seriously, that’s about it.

Let’s spend a little time talking a bit about baking, then. Namely, why it’s so easy to screw it up and what are some steps we can take to give ourselves a fighting chance.

• WHY YOU NEED TO LEARN THIS:

Baking’s not like savory cookery, where you can fix stuff as you go along. “Taste. Analyze. Adjust. Taste.” That’s what we tell our culinary students over at Kendall College. But, with baking and pastry, there’s none of that. Once it goes into the oven, there’s no turning back.

• THE STEPS YOU TAKE:

Today’s column is a little different. Instead of walking you through the steps of how to make something delicious, we’re going to talk about a few of the common pitfalls that can turn an otherwise delicious treat into a sack full of nasty.

First, though, full disclosure: I’m not a baker. Compared with my awesome colleagues in Kendall’s Baking and Pastry Department, there’ve been times in the bake shop when I’ve felt like a duck with a Rubik’s Cube. And that’s precisely why I’m exactly the guy to talk about some common mistakes because I’ve made them all.

Here we go, then:

Read the recipe: This seems obvious, but in baking, everything is done for a purpose, and everything should be done exactly as it says. For example, bakers use several different mixing methods to combine ingredients, each of which has a different purpose and gives a different end result. Chocolate chip cookies, for example, are made with the “creaming method,” where the sugar and butter are whipped together to form a light emulsion into which the eggs are added slowly. If you just try to mix everything together, the emulsion won’t hold, and your labors will be for naught. Read the recipe through (twice) before you start, then follow it as you would directions out of hell.

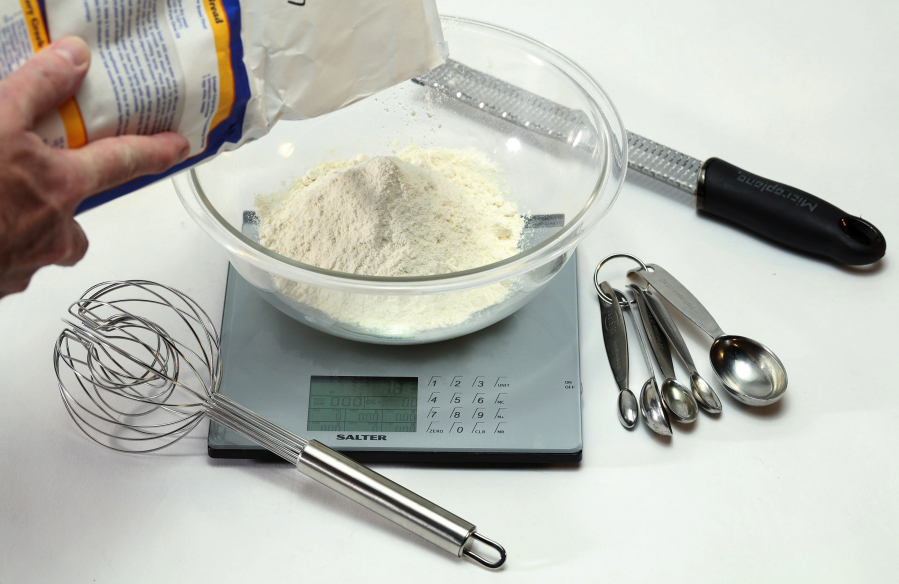
Ingredients: Next, as long as you’re reading the recipe in advance, make sure you’re using the ingredients it calls for. This sounds obvious, too, but, look: Every ingredient in baking has a specific function, and if you start making substitutions, you might lose some of that function. If a recipe calls for milk, for example, it means whole milk, not skim or 2 percent. Less fat can result in a drier product. And when a recipe calls for an egg, it means a large egg. Not medium, not jumbo. Large. Since they are primarily water, having the wrong size egg can result in the wrong amount of liquid, which can then screw up your final product. As a rule of thumb, anytime you ask, “Is Ingredient X the same as Ingredient Y,” assume the answer is a resounding “No!” As in, “No, don’t substitute baking soda for baking powder.” Or, “No, don’t substitute bread flour for cake flour.” Or, “No, don’t substitute spitting cobra venom for 60 percent chocolate chips.” It’s not the same.

Sifting: This is often considered one of the more butt-painy kitchen tasks. The flour gets everywhere and the dog looks as if it’s working undercover at a drug cartel. Sifting your dry ingredients is important, though. First, it removes little lumps of things we don’t want lumps of, like hardened sugar or baking soda. Also, sifting aerates the ingredients and helps them to combine evenly, giving you a better final product. If you don’t have a sifter, you can achieve the mixing and aeration simply by whisking. That won’t get rid of any clumps of craziness, but it’ll help distribute the ingredients evenly.

Scaling, aka measuring: Mis-scaling is probably the easiest mistake to make and can result in vastly different outcomes. Adding a tablespoon of baking powder, for example, when the recipe calls for a teaspoon, is not only going to screw up the texture of your cupcakes, it’s going to give them that nasty, chemically flavor that makes them taste like something robots eat. If you really want to get crazy, get yourself a good quality kitchen scale, and only work with recipes that use weight. Weight is a much more accurate representation of reality than volume. That’s why your box of Toasted Krunchy O’s says, “The contents of this box are sold by weight and not by volume. Some settling may have occurred during shipping.” And that’s also why, when you open it up, the box looks only a third full.

Oven temperature: How far can you throw your oven? Coincidentally, that’s about as far as you should trust the accuracy of its thermostat. Get yourself a sturdy oven thermometer, and replace it every year. If you set your oven for 350 and the thermometer reads 325, then you know to crank the heat a little.

Practice: Remember, this stuff is hard. And like everything else, the more you do it, the better you’ll get. The more you make a recipe, the more you’ll understand what’s going on, and you’ll begin to see how it all comes together. And that will give you better and more satisfying results. Dig?

Morning Briefing Newsletter envelope icon
Get a rundown of the latest local and regional news every Mon-Fri morning.

Chocolate Linzer Hearts

Prep: 20 minutes. Bake: 8 to 10 minutes. Makes: 30 cookie sandwiches (if using 2- to 2½-inch-wide cutters).

This updated version of the classic Linzer dough cookie is adapted from Kendall College chef Heidi Hedeker and originated in her time at Alliance Bakery. The cocoa deepens the traditional spice notes, while lemon zest brightens the whole taste. The recipe makes a soft dough; if you find it hard to work with, try chilling it longer. Hedeker rolls her dough to ¼ inch, but we also liked it at an even thinner depth.

8 ounces butter, room temperature

6 ounces granulated sugar

2 teaspoons grated lemon zest

3 egg yolks

8 ounces bread flour

6 ounces hazelnut flour

1 tablespoon cocoa powder

2 teaspoons ground cinnamon

½ teaspoon ground cloves

Powdered sugar, for dusting

6 ounces raspberry jam

1. Cream together the butter, sugar and lemon zest on medium speed with the paddle attachment of an electric mixer until lightened and fluffy, 8-10 minutes.

2. Gradually beat in the yolks, one at a time, about 5 minutes.

3. Sift together the dry ingredients (except powdered sugar); add these gradually to the creamed butter-sugar-egg mixture, on low speed, still using the paddle.

4. Take the dough from the mixer, press into a 1-inch thick slab and wrap in plastic. Refrigerate for at least an hour.

5. Roll dough out to 1/8-inch thickness, dusting with flour as needed.

6. Cut shapes from the dough, calculating two cookies to make one sandwich cookie. Using a smaller cutter, make cutouts in the top layer of each cookie. Transfer to parchment- or silicone baking mat-lined baking sheets.

7. Bake at 375 degrees until the cookies slide easily on the parchment or baking mat, 8 to 10 minutes. That indicates they are done, because most of the moisture has baked away, thus they are not clinging to the paper anymore. Allow to cool.

8. Dust the top cookies with powdered sugar. Sandwich cookies together with raspberry jam.

Nutrition information per cookie sandwich: 161 calories, 10 g fat, 4 g saturated fat, 35 mg cholesterol, 16 g carbohydrates, 9 g sugar, 2 g protein, 2 mg sodium, 1 g fiber.

Loading...